1. Floating design problem

2. Design won’t go into the frame

3. Design crops in the frame
Struggling with Canva Mockups? Your Top 5 Problems Solved!
If you’ve ever spent hours perfecting a digital product only to have it look flat, floating, or just plain off once you drop it into a mockup, you aren’t alone. We’ve all been there, staring at the screen, pulling our hair out, knowing something is wrong but not quite sure how to fix it.
High-quality mockups are the bridge between a customer browsing and a customer buying. But even the best mockup can look unprofessional if you hit a technical snag or don’t know how to use the mockup properly.
Let’s dive into the top 5 most common Canva mockup struggles and how to fix them in seconds.
1. The Flat or Floating Design Problem
THE STRUGGLE
You’ve placed your design over a mockup object, or into a mockup frame, but the mockup looks like it’s hovering on top of the background rather than being a physical part of the scene.
THE REASON
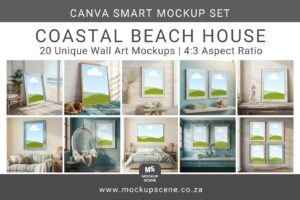
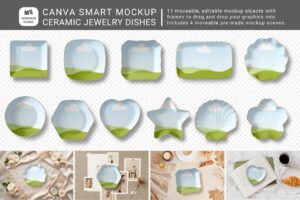
Digital designs lack the natural highlights and shadows that real-world objects have. Additionally, Canva treats Transparent PNGs (like a flat t-shirt image) and Container Frames (the ‘cloud and grass’ shapes) differently when it comes to adding depth.
THE SOLUTION
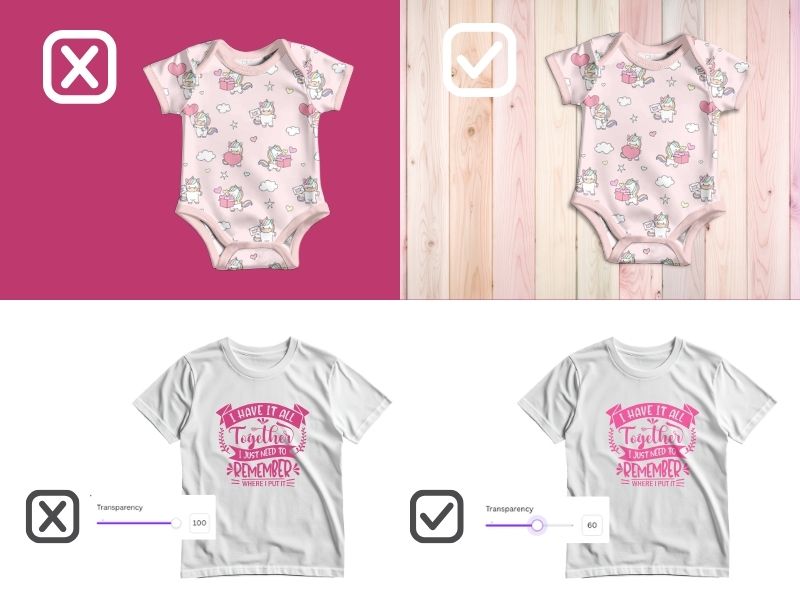
- For PNG Overlays (e.g., a white tee or blank book cover): Reduce your design’s transparency by 20-30% This allows the underlying texture of the PNG to peek through, making it look ‘printed’ onto the fabric.
- For Moveable Objects: If your mockup is a moveable transparent PNG, go to Edit Image > Shadows > Drop. Match the angle to the lighting in your background!
- For Container Frames: (Here’s a secret) you cannot add a shadow to an empty frame. You must first drop your design into the frame; only then will the ‘edit’ and ‘drop shadow’ options work. Note: If you remove the image later, the shadow will disappear with it!
- Background consistency. Make sure the intensity of your background matches your design. If your design is light, it will work better on a lighter background, vs a dark design which will work better on a darker background.
2. “My Design Won’t Go into the Mockup Frame!”
THE STRUGGLE
You are dragging your design over a mockup frame in Canva, but it just sits on top like a stubborn sticker and refuses to “snap” inside.
THE REASON
This usually happens for one of three reasons:
- Incompatible File Format: Canva frames only accept single image files (JPG or PNG). If your design is a group of elements, a vector graphic, or live text, the frame won’t recognize it.
- The Fake Frame: Unfortunately, some sellers provide PNGs that look like Canva frames (with the cloud and grass design) but are actually just static images.
- Broken Construction: The mockup wasn’t built correctly by the designer, and the frame layer is buried or non-functional.
THE SOLUTION
- Flatten your design: Download your design as a high-quality PNG, re-upload it, and try dragging it in again. Make sure it has a background and is not transparent.
- Test it: Try dragging a random photo from the Canva Photo library into the frame. If a standard Canva photo won’t snap in, the mockup is broken or fake.
- Contact the Seller: If it’s a fake frame parading as a real one, it’s time to ask for a refund. A quality mockup should always have a functional, snappable container frame.
- The Ethics Check: If you are flattening Canva Pro vectors to make them fit a frame, remember that this strips the creator’s code. To ensure creators get paid, combine Pro elements with other graphics first or stick to free elements for flattening.
3. The Cropped Content Headache
THE STRUGGLE
You drag your square planner into a vertical 6×9 inch mockup frame, and half of your beautiful design is chopped off.
THE REASON
Your design and the container frame have different aspect ratios. Canva is programmed to center-crop an image to fill the frame entirely, which usually sacrifices the top and bottom or side edges.
THE SOLUTION
- Match your Ratios: Check the dimensions of a mockup frame before you buy. If you’ve already bought it, double-click the frame to see if you can rotate or shift the design.
- The ‘Fitting Room’ Hack: Take a screenshot of a mockup before purchasing. Upload it to Canva and overlay your design at 50% transparency. This lets you see exactly how it will fit before you spend anything.
4. “My Design Keeps Snapping to the Background!”
THE STRUGGLE
You try to move your design into a smaller frame, but it keeps hijacking the entire page background instead.
THE REASON
Many templates use a large container frame as the background. Canva assumes that if you’re dragging an image over a giant frame, that’s where it belongs.
THE SOLUTION
- Delete the Background Frame: Replace it with just an image. This removes the ‘magnet’ effect that pulls your designs into the background.
- The Magic Key: Hold down the Cmd (Mac) or Ctrl (PC) key while moving your design. This overrides the snapping feature, allowing you to slide your design right over a frame without it being sucked in.
5. Blurry or Pixelated Mockup Exports
THE STRUGGLE
Your listing looks crisp in Canva, but when you upload it to your shop, it looks blurry and unprofessional.
THE REASON
This is usually caused by low canvas resolution, the wrong file format, device or platform compression (where the website shrinks your file to save space).
THE SOLUTION
- Check the Pixels: Ensure the long edge of your canvas (design page) is at least 2000–2500 pixels.
- Format Matters: Use PNG (not transparent) for the best clarity.
- Platform Specs: Check the specific size requirements for your platform (like Etsy’s 4:3 ratio). If you upload the exact size they ask for, their system is less likely to crunch your image.
- Desktop over device: Make sure you’re downloading your images from a computer or ipad/tablet not a phone because the mobile app compress the downloaded file due to device memory and app limitations.
- Viewing size vs actual size: If you’ve viewing the design on a large screen and the actual design size is small (e.g. for a social post) then it’s going to look pixelated on your screen but might look fine at actual size (e.g. in the social platform on a small screen).
Additional check: sometimes blurry downloads are caused by poor or intermittent internet connection. Check with your service provider if there are any connectivity issues or try a different connection.
Final Thoughts
Mockups shouldn’t be the hardest part of your creative process! Once you master these five quick fixes, you’ll spend less time troubleshooting and more time launching products that actually sell.
Which of these has been your biggest headache? Drop me an email and let me know, I’d love to help!